How to Watch and Share TV Without a TV

Unless you want to feel left out around the watercooler tomorrow, how can you catch and share your favorite shows while glued to your laptop instead of a plasma? The answer: Slingbox and iShowU.
Setting Up the Slingbox

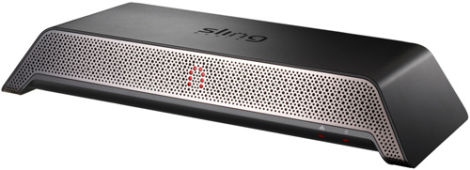
Slingboxes come in two basic models, the SOLO (MSRP $179 USD) and HD (MSRP $299 USD). The HD version (pictured here) lets you connect up to three devices and features a few digital ports for clearer picture, but the basic idea is the same for both models:
- Plug your cable set-top box, DVR, satellite receiver, DVD player, or digicam into the Slingbox
- Hook the Slingbox up to your local network's router via Ethernet
- Turn on the juice, fire up the SlingPlayer software on your computer, and enjoy the new episode of LOST — directly on your computer, from anywhere!
TV, Wherever and Whenever
Once you've installed and launched the SlingPlayer desktop application (you can download it for free here), it should locate your local Slingbox automatically.
But what if you're away from home?
No problem, as long as you're equipped with your unit's unique Slingbox ID.
In fact, as long as you have a solid Internet connection (and remember to pay your bills), the Slingbox technology lets you watch TV remotely — from anywhere in the world.
That's right, you don't even have to be connected to your own network. You can watch TV from your bedroom, the PC at your office, or even while you're backpacking across some exotic country halfway around the world.
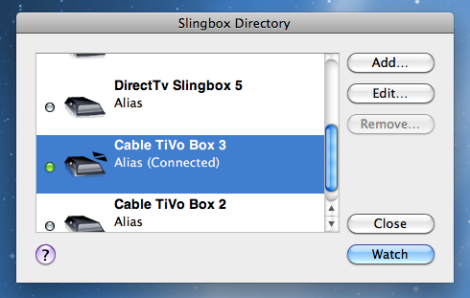
To find your Slingbox ID, just choose your local box from the Slingbox Directory (⌘D or the "Window" menu) while connected on your home network. Hit "Edit," then "Connection."
Your Slingbox ID will appear in the new window, and you can copy and paste it to a safe place for later reference. Then, next time you're away from home and itching for the boob tube, use the Directory's "Add" function and follow the prompts to remotely add your Slingbox using its Slingbox ID.
Using Slingplayer
Now the fun begins.
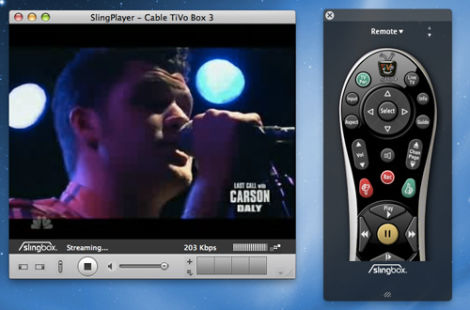
Once it's connected, SlingPlayer acts like any real TV. It even includes several virtual remote controls with many of the same functions as a real remote to adjust volume, change channels, and navigate menus.
These Are a Few of Our Favorite Things
Another great feature is SlingPlayer's favorites bar. Located above the remote is a "Favorites Bar," to which you can add your most frequently watched channels. Hit the + button beside the Favorites Bar to pull up the appropriate dialogue.

Then just fill out the channel name, number, and select the network logo (all of the major ones are included, and you can add custom ones if yours isn't), hit "Add," and enjoy easy, one-click access to your favorite networks.
We Show You: iShowU
But what about recording video? SlingBoxes aren't hard drives, and SlingPlayer doesn't have the functionality to convert video and save it to yours.
If you're just looking to watch TV when and where you want, hooking up your Slingbox to a DVR is still the best way to go. But you'll need a few more tools if you want to start capturing and manipulating that video yourself.
iShowU is one versatile option. A license will run you between $20 and $60 depending on whether you opt for the classic, HD, or HD Pro versions.
The HD and Pro versions are generally faster and have better integration with YouTube, Final Cut, and iSight, along with a few other features that are useful if you plan to make video tutorials or record any game-playing, but we'll focus on the Classic version for now.
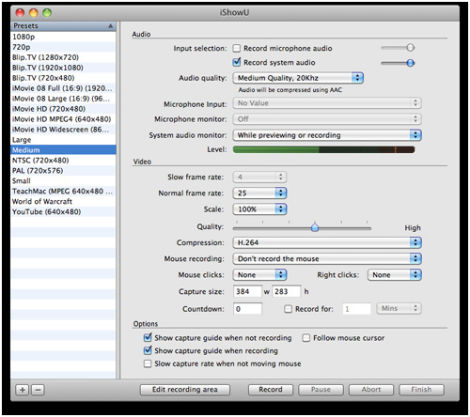
Presets and Options and Menus, Oh My
iShowU comes with several presets for what you're recording or what you're recording for, but you can also create and save your own custom presets or tweak the existing ones if you'd like to do things like record microphone audio, capture the on-screen cursor in your video, scale the size of your video, etc.
The HD version of iShowU has even more of these fringe features, and its interface is more complicated. You might find that while it boasts better speed, you'll likewise need a more powerful computer to run iShowU HD smoothly.
Recording with iShowU
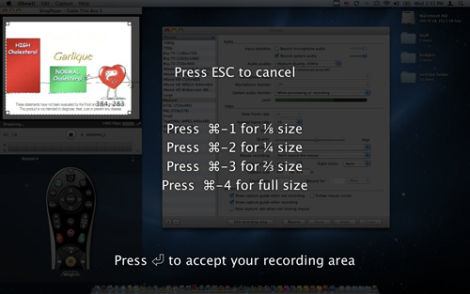
To record, start by clicking "Edit recording area" in iShowU. The screen will go dark except for a single box, which you can move, scale, and resize however you'd like. Position it over the video you want to capture (the SlingPlayer window, in our case), and hit Return to confirm the recording area.
Then hit "Record" and you're good to go! if you make a mistake, you can pause or abort the recording at any time. Once you're done, hit "Finish" and iShowU will save the recorded file.
You can choose where to save the finished product in the Preferences menu.
* A quick warning about keyboard shortcuts: If you're like me, you use them all the time, especially Shift + Apple + A (a Finder shortcut that opens the Applications folder). While open, iShowU will override that shortcut on a system-wide level to begin recording video.
It's a mild annoyance, but worth keeping in mind if you're trying to multitask while using iShowU.
Sharing It with the World
Once you're done capturing your video, you can import it to QuickTime, iMovie, Final Cut (or any video editor you'd like, really) and upload the final product.
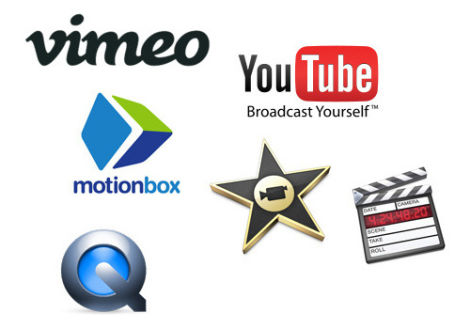
There are several video hosts you can pick from, of course. Motionbox, Vimeo, and YouTube are great, popular choices, or you can upload it to your own server, embed it in your website or blog, or post it on your Facebook wall.
Or (even better), submit it to us! Once you've mastered the art of Slingbox, iShowU, and beefed up your editing skills, you too can start creating and sharing music videos, compilations, and clip reels.